Emeraude the Garden Fairy Amigurumi Pattern
Beginner Friendly
Perfect for those just starting their crochet journey, with clear instructions and simple techniques
Single-Day Project
A satisfying project you can complete in a single afternoon or evening.
Handmade Gift
A beautiful keepsake — free forever. Read online or print at home.
About This Emeraude the Garden Fairy Amigurumi Pattern
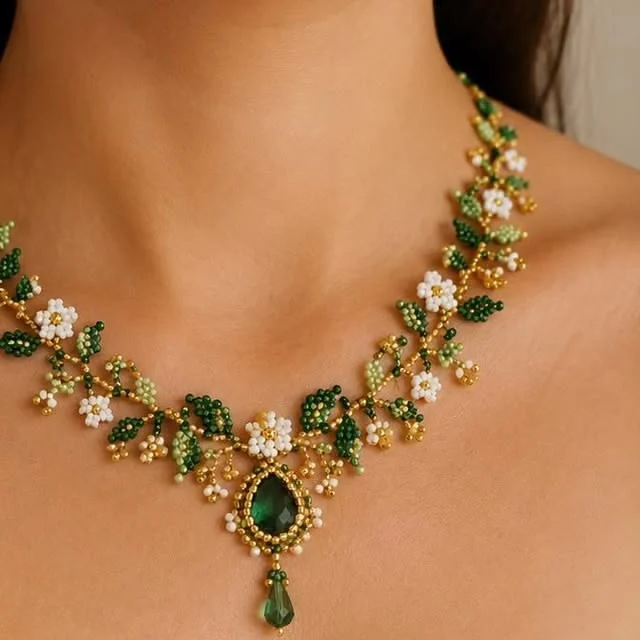
This garden fairy amigurumi pattern brings Emeraude to life, a doll built around a rich emerald-green bodice, tiny white blossom trim, and a single faceted “gem” pendant crocheted right into her chest. The color palette pulls straight from antique beaded jewelry — deep green, warm gold, and soft white — translated into yarn instead of beads, so the finished piece has that same layered, botanical richness without a single actual bead involved.
Plan for roughly 9 to 11 hours from first magic ring to final stitch. The body and limbs move quickly, but the blossom trim, vine cording, and the pendant itself are all small separate pieces that take patience to make neatly and attach well. This is a genuinely advanced project, not a quick weekend make.
Emeraude suits a crocheter who’s already comfortable with amigurumi shaping and wants to practice combining several techniques in one piece — solid rounds, a flat crocheted appliqué, a small dimensional pendant, and surface embroidery. If you’ve finished a few straightforward amigurumi and want your first piece with real “jewelry-inspired” detail work, this is a good next project.
Materials
- Emerald green DK/worsted cotton-blend yarn main color — bodice and legs
- Skin-tone DK yarn for face, neck, and hands
- Ivory or white DK yarn blossom trim
- Gold or mustard-yellow DK yarn vine cording and blossom centers
- Small scrap of deep green sport-weight or embroidery thread pendant stitching detail
- 8mm safety eyes x2
- 3.5mm (US E/4) crochet hook
- 2mm steel hook or smaller for the vine cording, optional
- Polyester fiberfill stuffing
- Yarn needle
- Stitch markers at least 4
- Embroidery needle and brown or black thread for the face
- Scissors
Abbreviations
MRmagic ringchchainscsingle crochethdchalf double crochetincincrease (2 sc in same stitch)decinvisible decrease (sc2tog)sl stslip stitchst(s)stitch(es)rnd(s)round(s)()repeat instructions inside parentheses*repeat from asterisk as directedHead
- Rnd 1 (Skin tone): 6 sc in MR (6)
- Rnd 2: inc around (12)
- Rnd 3: *sc 1, inc* around (18)
- Rnd 4: *sc 2, inc* around (24)
- Rnd 5: *sc 3, inc* around (30)
- Rnds 6-10: sc around, 5 rounds even (30 each round)
- On Rnd 8, place safety eyes about 8-10 sts apart, centered on the round
- Rnd 11: *sc 3, dec* around (24)
- Rnd 12: *sc 2, dec* around (18)
- Stuff firmly now, before the opening gets smaller
- Rnd 13: *sc 1, dec* around (12)
- Rnd 14: dec around (6)
- Fasten off, leaving a long tail. Weave through remaining 6 sts, pull closed, reserve tail for sewing to the body
Body
- Rnd 1 (Emerald green): 6 sc in MR (6)
- Rnd 2: inc around (12)
- Rnd 3: *sc 1, inc* around (18)
- Rnd 4: *sc 2, inc* around (24)
- Rnds 5-9: sc around, 5 rounds even (24 each round)
- Rnd 10: *sc 2, dec* around (18)
- Rnd 11: sc around, neck round (18)
- Stuff firmly, leaving the neck opening slightly softer than the rest
- Fasten off, leaving a long tail for sewing to the head
Arms (make 2)
- Rnd 1 (Skin tone): 5 sc in MR (5)
- Rnds 2-3: sc around (5 each round)
- Change to Emerald green
- Rnds 4-9: sc around, 6 rounds even (5 each round)
- Lightly stuff, leaving the top 2 rounds unstuffed and flat for sewing
- Fasten off, leaving a tail for attaching to the body
Legs (make 2)
- Rnd 1 (Skin tone): 6 sc in MR (6)
- Rnd 2: inc around (12)
- Rnds 3-4: sc around (12 each round)
- Change to Emerald green
- Rnds 5-11: sc around, 7 rounds even (12 each round)
- Stuff firmly throughout
- Fasten off, leaving a tail for attaching to the base of the body
Blossoms (make 5)
- Rnd 1 (Ivory): 5 sc in MR (5)
- Rnd 2: *(sc, hdc, sc) in next st, sl st in next st* around this forms 5 petals from the 5 base stitches
- Fasten off, leaving a short tail
- With gold yarn, embroider a single French knot in the center of each blossom
- Repeat for a total of 5 blossoms
Pendant
- Rnd 1 (Emerald green): 6 sc in MR (6)
- Rnd 2: inc around (12)
- Rnd 3: *sc 1, inc* around (18)
- Rnd 4: sc around (18)
- Rnd 5: *sc 1, dec* around (12)
- Do not stuff — flatten and fasten off, leaving a long tail
- With deep green embroidery thread, stitch 4-6 straight lines from the center out to the edge across the front, mimicking the faceted cut of a gemstone
- Set aside for attaching to the neckline
Vine Cording
- With gold yarn and the smaller steel hook (or your main hook if easier), chain a length about 25-30cm long
- Sl st back down the chain to create a firm, rope-like cord
- Make one length for the neckline trim and, if desired, a second shorter length for a hair accent
- Fasten off both ends, leaving short tails for tacking down
Finishing
Sew the head to the body at the neck, tucking the seam under. Sew the arms to the upper sides of the body and the legs to the base so Emeraude can sit or stand. Arrange the gold vine cording in a soft curve across the front and upper back of the bodice, tacking it down every couple of centimeters with small stitches in matching thread. Sew the five blossoms along the vine’s path, spacing them so two or three sit near the front and the rest trail toward the back, exactly the way trim gathers along a necklace. Center the pendant at the front of the neckline, just below where the vine dips lowest, and sew it flat against the bodice. Finish the face with a small embroidered smile in brown or black thread, and add two light pink cheek stitches if you’d like a softer look.
Tips for Success
- Make all five blossoms and the pendant before you touch the vine cording — you’ll place the cord’s curve around them, not the other way around.
- Keep the pendant unstuffed and flatten it firmly before embroidering the facet lines, or the lines will pucker instead of lying flat.
- Use a slightly smaller hook for the vine chain than for the body — a looser chain looks like rope instead of a crisp vine.
- Pin the vine cording in place with locking stitch markers before you start tacking it down, so you can adjust the curve while it’s still movable.
- Sew safety eyes in before stuffing the head fully — it’s much easier to push the posts through while the fabric still has some give.
Common Mistakes to Avoid
- Attaching blossoms in a perfectly even row. Fix: cluster two or three near the front pendant and let the rest trail more sparsely toward the back, the way real trim gathers.
- Making the pendant too puffy by stuffing it. Fix: leave it unstuffed and press it flat before embroidering, so it reads as a flat faceted gem rather than a round ball.
- Tacking the vine cord down at only the two ends. Fix: catch it every couple of centimeters along its length or it will sag away from the body over time.
- Using a yarn that’s too thick for the vine chain, which looks bulky instead of delicate. Fix: switch to a finer yarn or a smaller hook just for that piece.
- Overstuffing the arms and legs so they lose their softer, doll-like shape. Fix: stuff lightly and evenly, checking as you go rather than packing in at the end.
Ways to Customize This Pattern
- Swap the emerald green for sapphire blue or ruby red for a completely different “jeweled” character using the same construction.
- Add a second, smaller pendant just above the main one for a layered necklace effect.
- Crochet a matching tiny circlet using the vine cording and one extra blossom to sit on Emeraude’s head.
- Use a metallic or sparkly yarn for the vine cording instead of plain gold for extra shine.
- Leave off the pendant and add three blossoms in its place for a simpler, all-floral bodice.
Frequently asked questions
Yes — a scrap of metallic or sparkle-blend yarn worked into the facet stitches instead of embroidery thread gives a similar effect with less separate stitching.
Pin it into its final curve with locking stitch markers first, then tack it down in short sections rather than trying to sew the whole length in one pass.
Yes, though the finished doll will come out slightly larger, around 21-22cm instead of 19cm. Size up the hook slightly and the stitch counts will still work.
No — they’re flat appliqué pieces meant to sit against the body, so leaving them unstuffed keeps them from bulging awkwardly.
The finished Emeraude the Garden Fairy Amigurumi Pattern